
In the last article I explained why using Microsoft Azure for a Failover Clustering witness can be a great and good idea. This post will cover the installation of a Microsoft SQL Server Always On Availability Group using a Cloud witness for a Citrix Virtual Apps and Desktops site.
Prerequisites:
-
At least 2 Microsoft SQL servers (Enterprise edition for the normal Availability Group functionality)
- FR-SQL-01 / 10.92.100.31/16
- FR-SQL-02 / 10.92.100.32/16
- At least 1 Windows server to install the Citrix Virtual Apps and Desktops Delivery Controller
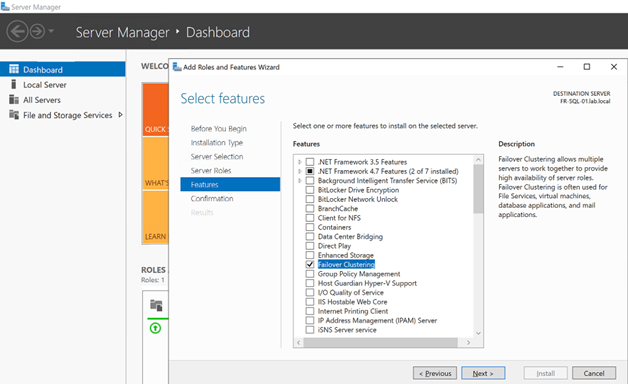
Add the Windows Failover Clustering feature on both servers:
Once the feature is installed and the server are rebooted, launch the Failover Clustering console:
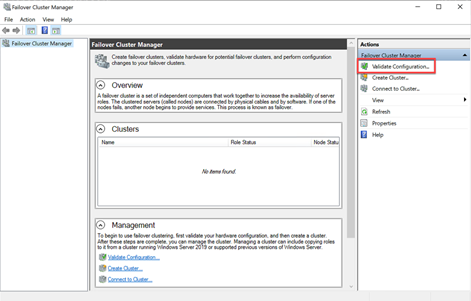
Click on Validate Configuration…
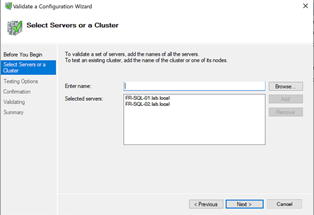
Add both server in the selected servers and click Next to launch all tests.
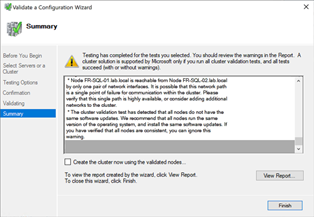
As you can see my lab is running with some “limitations” but you can go ahead as it’s not going to be a production environment!
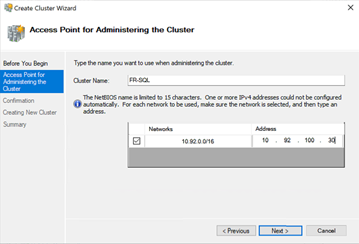
You need to provide a Cluster name and an IP:
Once the Cluster Name created, you need to provide the computer account the following right on the OU it is located:

You can now configure the instance to support Always On Availability Group from the SQL Server Configuration Manager:
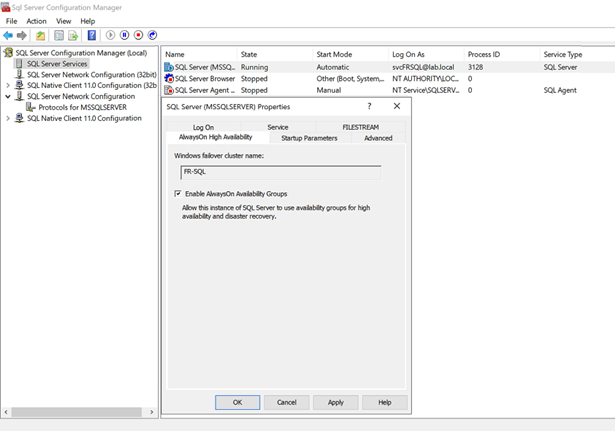
You need to verify that the SQL instance is running with a domain service account (or you will need to use the certificate base authentication). For the default instance name, you can verify it using the following PowerShell command:
Get-WmiObject win32_service -filter “name = ‘MSSQLSERVER'” | Format-Table name,startname

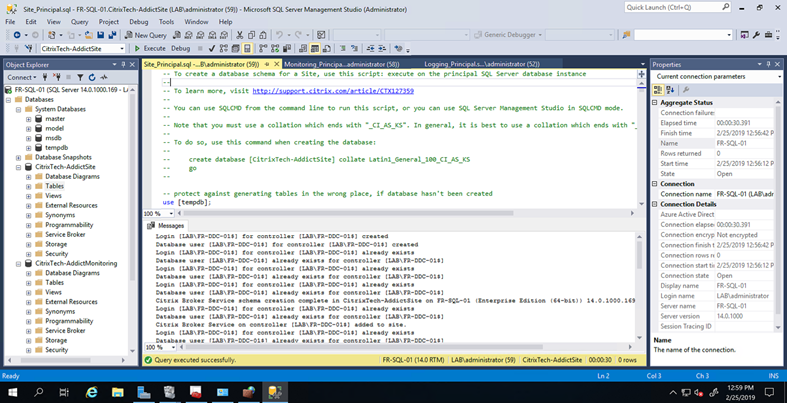
Now we can create a database to be replicated between the 2 nodes. For this example, I used a Citrix Virtual Apps and Desktops site. You first need to create the databases:
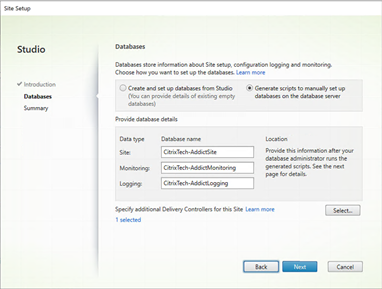
It generates scripts than you need to launch on the first SQL server (FR-SQL-01):
We now have the databases, let’s make them highly available!
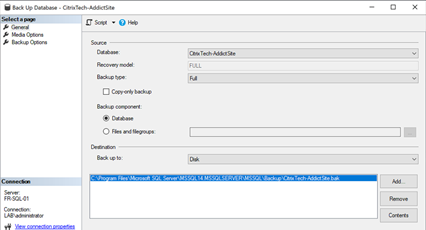
You first need to create a full backup of each Database:
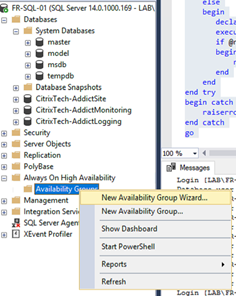
On the Always On High Availability section, right click on Availability Groups and select the New Availability Group Wizard
It shows a wizard like this:
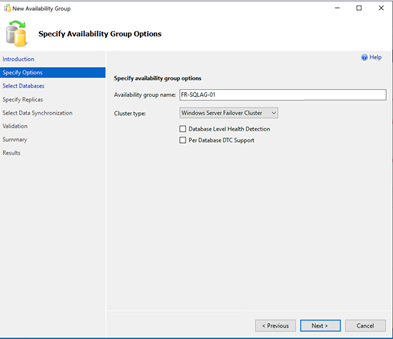
Select a name for the Availability Group: FR-SQLAG-01
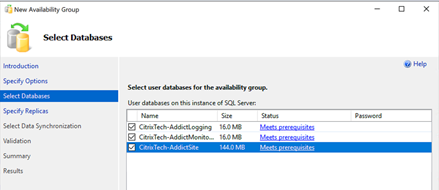
You can now select the databases you want to protect:
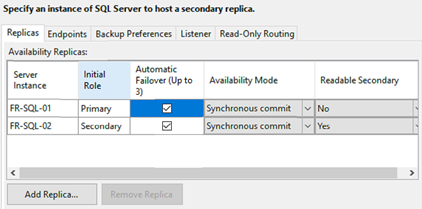
You can now add the second node and choose if you want Synchronous commit or not:
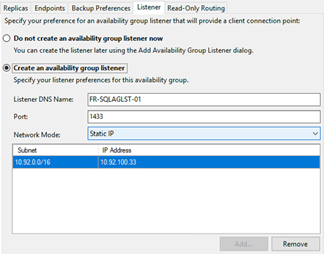
You also need to create the listener:
You need to create the Login and give access to the Hadr_Endpoint to the service account you are using on both servers FR-SQL-01 and FR-SQL-02:
CREATE
LOGIN [lab\svcfrsql] FROM
WINDOWS
GO
GRANT
CONNECT
ON
ENDPOINT::[Hadr_Endpoint] TO [lab\svcfrsql]
GO
The Always On should be like this:
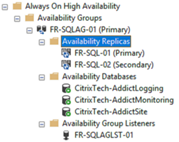
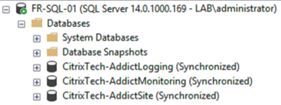
And the Databases like this:
Now that the databases are synchronized, you can use it and configure the Citrix Virtual Apps and Desktops site:
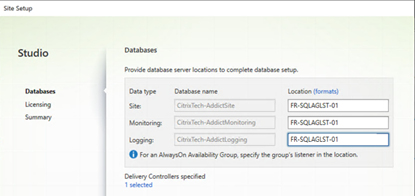
As you see you need to specify the group4s listener as the location of the databases. The setup will populate the SQL databases and will create the site.
Everything is working like a charm, isn’t it? Microsoft SQL Always On is a magic feature as the application can’t see that the database is replicated but there is a major caveat (at least for us Citrix admins!), the SQL logins are not replicated between the different replicas. As an example, the Citrix setup creates a login for the Delivery Controller on the primary server:

If we go to the second replica, you will see that this login is not present:
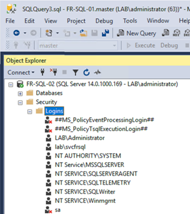
So basically, the database is replicated, and everything seem to be good but if you make a failover to the second replica, the Delivery Controller will not be able to connect to the database! I’ve seen this configuration mistake a lot of times…
Of course you can create the Delivery Controllers login on the second replica but I’d suggest you to use one the following solution https://blogs.msdn.microsoft.com/sql_pfe_blog/2017/08/21/sync-sql-logins-and-jobs/
I’d recommend like the author of the blog post the use of https://dbatools.io/ solution by the Microsoft MVP Chrissy LeMaire (https://twitter.com/cl)
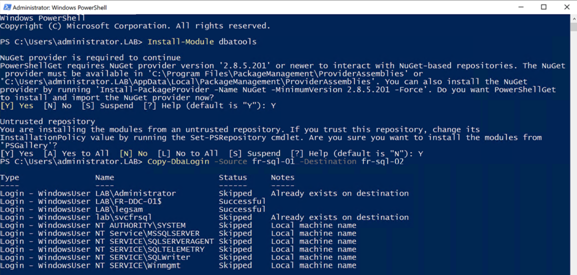
To resume, you just need to install the dbatools:
Install-Module dbatools
And once installed, you just have to run the following command
Copy-DbaLogin -Source fr-sql-01 -Destination fr-sql-02
Copy-DbaLogin -Source fr-sql-02 -Destination fr-sql-01
I highly recommend scheduling those last commands on a daily basis to be able to get the newly added Delivery Controllers.
You can now use both servers as the primary role for the SQL!
It’s now time to add an additional vote to the cluster as it’s not recommended to have only 2 nodes without witness. You can configure it, in the Failover Cluster Manager console:
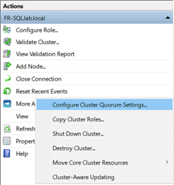
Click on Configure Cluster Quorum Settings.
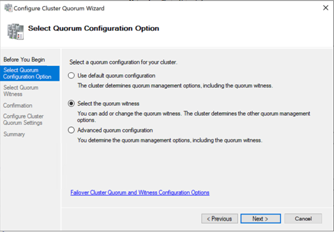
Choose Select the quorum witness:
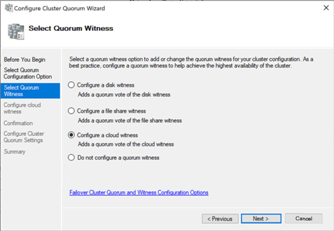
Choose Configure a cloud witness:
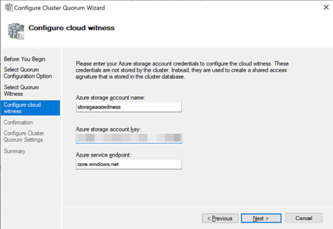
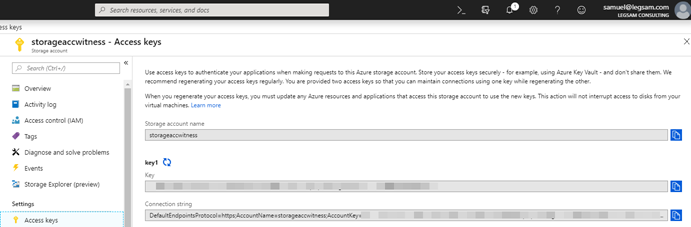
To fill this form, you need to connect to your Azure portal to retrieve the information on your Storage Account:
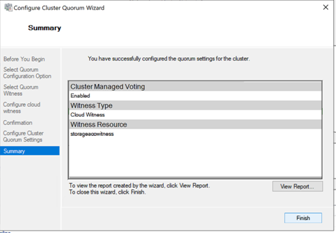
Once finished, you should be able to see the Cloud Witness:

You can verify that the data is written on the Azure Storage Account, by retrieving the Cluster ID by using the following command:
Get-Cluster | select Name, ID

In the Azure portal:
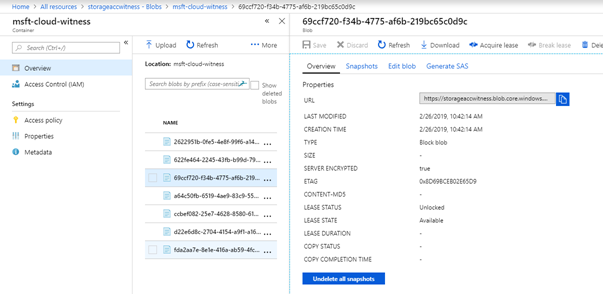
Note from the field:
Your Internet connection needs to be stable as it can remove a vote on your cluster.